 Smartphonetechie
Are you a big fan of flashing your Samsung Galaxy S4 and installing new ROMs. Well, if you are then you should know that you need a custom recovery to install custom ROMs. And in order to install a custom recovery on Samsung Galaxy S4 you need to follow a simple yet technical method. So, here we are with a step by step guide on how to flash custom recovery but first let’s talk about popular custom recoveries.
Popular Custom Recovery for Samsung S4:
Here are two most popular custom recoveries you can install on your Samsung Galaxy S4. You can choose either one of these as they are pretty good and will suffice your every single need related to flashing a new ROM on your beautiful Samsung Galaxy S4.
-
CWM Recovery:
Most of the developers out there prefer to use CWM Recovery. The best thing about this recovery is that it allows you the freedom to use your device the way you want to unlike the stock android recovery. Using CWM recovery you can install different kernels, ROMs, themes and much more on your smartphone which you cannot do with the stock recovery.
-
TWRP Recovery:
Well, how can someone forget about the TWRP recovery. This is the first custom recovery out there which implemented touch functionality in a recovery thus making a custom recovery more interactive and easy to use. Just like CWM, you can use TWRP recovery to use your smartphone with freedom.
Both of these custom recoveries are great you can use either of them on your Samsung Galaxy S4.
Install Custom Recovery on Samsung Galaxy S4:
Now here’s a step by step guide which will enable you to install custom recovery on Samsung Galaxy S4.
- In order to install custom recovery on Samsung Galaxy S4 it is important that you must have root access. If your device is not rooted then you should check our how to root Android smartphone tutorial.
- If you have the root access then it is important to download all required tool. You need the latest version of odin, your desired custom recovery and Samsung’s latest USB drivers.
- You can download Odin from here. To install the latest Samsung USB drivers it is highly recommended to download and install Kies from here. And you can download your desired custom recovery from the links below. Make sure to choose the right recovery for your S4. If you have i9505 then you should choose recovery for Samsung Galaxy S4 i9505 only. Installing i9500 recovery on i9505 might brick your smartphone.
- Now switch off your smartphone and put it in download mode. In order to switch to download mode press Home+Volume Down+Power Button simultaneously. It will give you a warning message. Ignore it by pressing Volume Up key.
- Now start Odin and connect your device with computer using data cable. Odin will detect your smartphone and will display the message Added. And ID:COM bar will turn light blue.
- Now click on PDA or PA button (this vary from one version of Odin to another) select the recovery file. Make sure Auto Reboot and F.Reset time are checked.
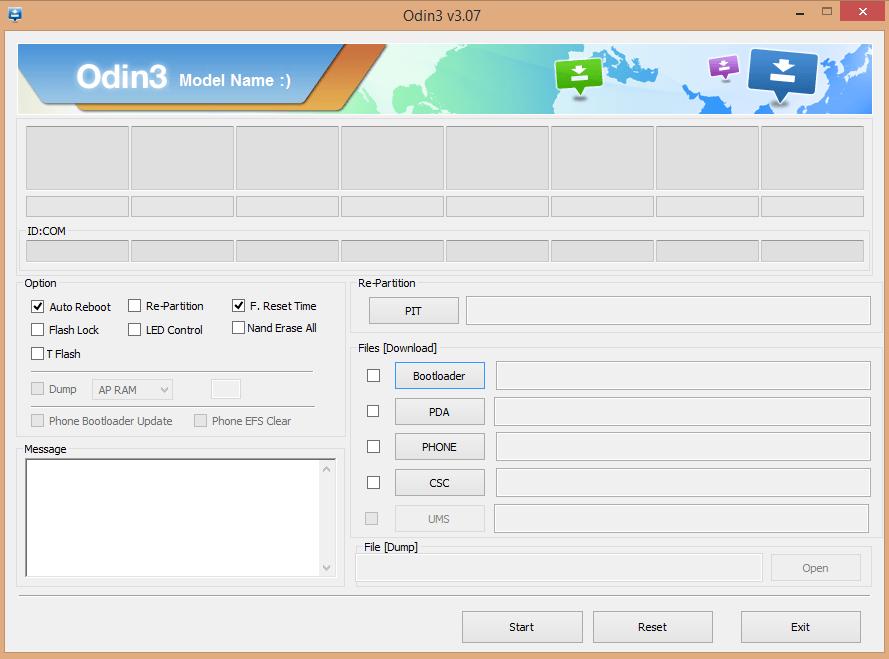
- Now click on start and it will start installing custom recovery on Samsung Galaxy S4. Your device will restart after a minute and Odin will finally display Pass message in green color.
So, flashing a custom recovery on android phone is pretty simple, right? But you have to make sure that you choose the right recovery depending on the model of your phone.